I created this guide to help you boost your computer’s performance without stress. I write in plain language so anyone can follow each step, even with little hands‑on experience.
When you decide to upgrade, you give your system more breathing room to run apps and handle tasks. That means fewer slowdowns and smoother multitasking.
I will walk you through identifying compatible modules, installing new sticks, and verifying the new memory. Each step is clear, practical, and safe.
By the end, you will know how to pick the right capacity and speed, install components, and confirm the upgrade went well. I keep safety and compatibility at the center of every instruction.
Key Takeaways
- I explain each step in simple, actionable terms.
- Proper parts and safety checks prevent damage.
- Installing more memory improves multitasking and speed.
- Compatibility matters: match module type and speed.
- You can test the new configuration with built‑in tools.
Understanding the Role of System Memory
Think of memory as the short-term workspace where your computer keeps what it needs right now. This temporary storage helps the processor access apps and files quickly so tasks feel responsive.
Random Access Memory (RAM) holds active data the system uses, which makes multitasking and gaming smoother. When more memory is free, the machine can handle heavier workloads with fewer pauses.
I like to use a simple metaphor: memory is a workbench. The bigger the surface, the more tools and data you can keep within reach. That directly boosts overall performance for everyday apps and demanding programs.
- You have several options when choosing memory modules; capacity and speed both matter.
- On a laptop or tower, matching type and frequency keeps the system stable.
- Good memory choices reduce swapping to disk and improve real‑world performance.
Determining Your Hardware Compatibility
https://www.youtube.com/watch?v=3E-nR86KTpQ
Start by checking what your system actually supports so you avoid compatibility surprises.
Identifying Memory Generations
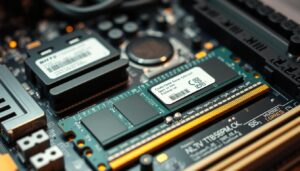
I first check the motherboard model and the manual to find the supported memory type, such as DDR4 or DDR5. This tells me which memory module fits the board and which slot layout the system uses.
Make sure the module speed and voltage match the motherboard specifications. If you are unsure, Micron and other manufacturers publish technical information that clarifies the details.
Checking Maximum Capacity
Next, I verify the maximum memory the motherboard and OS can handle. A 32-bit version of Windows will only see 4 GB, so check your Windows version early.
Count the number of memory slots on the board and note whether any are occupied. The number of slots plus per‑slot limits determine total capacity and the best way to populate modules for gaming or heavy data tasks.
I also advise looking in the BIOS for current settings. If you have questions about your specific computer model, consult the manufacturer manual for exact specifications.
How to Upgrade Desktop RAM Safely
Before you touch any parts, shut the system down and unplug every power connection. I always do this first to remove any risk of electric shock or accidental shorts.
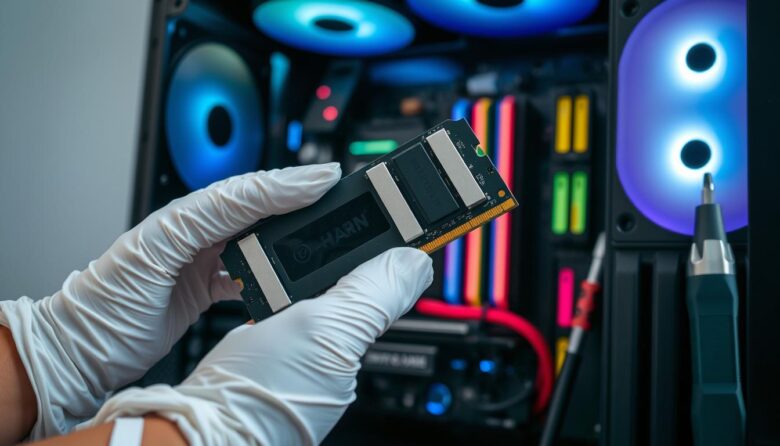
Handle components gently. When upgrading ram, do not force modules into the motherboard. Align the notch, seat the stick evenly, and let the latches click.
Install only supported memory types. Using the wrong module can cause physical damage to the module or the system board. Check the motherboard manual and note the supported capacity and speeds.
- Power down the computer and unplug the wall cable before opening the case.
- Work on a clean, static‑safe surface and ground yourself or use an anti‑static strap.
- Follow the steps slowly; rushing often creates issues that take more time to fix.
By following these steps carefully, you protect the new ram and improve system performance with minimal fuss. Keep your motherboard manual close; the correct number and placement of modules matter for best results.
Selecting the Right Memory Modules

I focus on compatibility first so you get parts that work the first time. Choosing the correct memory keeps the system stable and saves you returns and delays.
Purchasing from Authorized Resellers
Buy from authorized sellers to ensure you receive genuine items that match your system’s specifications. I prefer vendors listed on the motherboard or PC maker website because they list tested options.
You can identify your machine on the Dell support site using a Service Tag or Express Service Code. That simple lookup often shows compatible memory modules and exact speed and capacity limits.
Choosing the Right Specs and Form Factor
Match the module speed and capacity to what your board supports. Picking the wrong size or frequency can cause instability or no-boot scenarios.
If you need performance options, compare ram modules for latency, frequency, and price per gigabyte. Also confirm physical size—desktop and laptop parts are not interchangeable.
| Source | Pros | Cons | Best for |
|---|---|---|---|
| Manufacturer store | Guaranteed specs, warranty | Higher price | Exact match to system |
| Authorized reseller | Good selection, verified items | May need verification | General consumers |
| Third‑party marketplace | Lower cost, variety | Risk of counterfeit | Experienced buyers |
Final tip: always double-check the specifications on the product page against your manual before ordering new ram. A quick cross-check prevents most compatibility issues.
Essential Safety Precautions Before You Begin
Before you lift the case panel, I follow a short checklist to keep both me and the machine safe.
Power down completely. Shut the computer off and unplug every power cable. I also switch off any surge protectors or power strips to remove all power sources.
Work on a clean, static-free place. Lay a cloth or anti-static mat down and keep small items organized so you do not lose screws or tools.
- I set the computer on its side to expose the motherboard and to make slot access easier.
- Take the time to arrange tools and items before the installation. This simple step prevents many common issues and saves time.
- If you have questions about grounding or parts, check your computer’s manual for model-specific guidance.
Lighting and visibility matter. Use a bright lamp so you can see slot notches and latch positions clearly. Working in dim light increases the chance of error.
| Precaution | Why it helps | Quick tip |
|---|---|---|
| Remove all power | Prevents shorts and shock | Unplug wall cable and switch off strip |
| Static-free workspace | Protects parts from ESD damage | Use an anti-static mat or touch metal ground |
| Organize tools | Reduces mistakes and lost items | Lay out screws, tools, and modules before starting |
Installing Your New Memory Modules

Let’s start by opening the case so we can see the motherboard and memory layout clearly.
Opening the Computer Case
I power the computer off, unplug every cable, and ground myself. Then I remove the side panel and place it aside where it won’t scratch.
Locating Memory Slots
I find the memory slots next to the CPU. The clips sit at each end of the slot and help lock the module in place.
Tip: Check the motherboard manual to confirm slot order and the recommended slot for a single module.
Seating the Modules
Line the notch on the new ram module with the keyed slot. Hold the module by its edges and press down evenly until the clips snap.
You should hear a click that confirms the module is seated. If the clips do not close, remove the module and try again—do not force it.
After installation, replace the case, reconnect power, and enter the BIOS to verify the system recognizes the memory.
| Step | What to check | Outcome |
|---|---|---|
| Open case | Power off, ground yourself | Safe access to slots |
| Locate slots | Matched slot order per manual | Optimal channel speeds |
| Seat module | Align notch, press until click | Secure memory installation |
Verifying Your System Performance
After I finish the physical install, the next step is to confirm the system sees the extra memory.
Boot into the BIOS and check that the total capacity matches the number printed on your modules. This quick check shows whether the installation was successful at the firmware level.
Next, I run a short performance test to confirm the new ram runs at the expected speed. I use a simple benchmarking tool to watch for stability issues and to verify advertised speeds under load.
- Open Windows System Information if you have questions about reported speed and timings.
- Watch for errors or crashes during the test; they often point to compatibility issues.
- For gaming, monitor frame rates in a demanding title to feel real-world performance gains.
Finally, confirm that your computer model and all major applications access the new memory without errors. If anything looks off, recheck seating, slot population, and BIOS settings before seeking further help.
Conclusion
,Finishing this process leaves your machine more responsive and ready for heavier tasks.
I hope the clear steps helped you feel confident working on your computer. Successfully completing a desktop or laptop memory job is a practical skill that pays off in day-to-day use.
By following this guide, you learned safe practices for an upgrade ram procedure and how to avoid common hardware mistakes. Take small steps, test the system, and keep records of parts and settings for future care.
Thank you for following my step-by-step instructions. Enjoy the faster, more reliable computer performance and feel free to revisit any step when you need a refresher.
FAQ
How do I know if my motherboard supports the memory module I want?
I check the motherboard manual or the manufacturer’s website for supported memory types, maximum capacity per slot, and the number of slots. I also note the supported memory generation (such as DDR4 or DDR5) and speed. If the manual is unclear, I look up the exact model number printed on the board or use a trusted system information tool to confirm compatibility.
Can I mix new modules with my existing ones?
I avoid mixing modules of different generations, voltages, or timings. Mixing identical-capacity modules from the same brand and speed works best. If I must mix, I match speed and timing as closely as possible; otherwise the system defaults to the slowest module. For best stability and performance, I buy a matched kit.
What steps should I take before opening my case?
I power down, unplug the power cord, and press the case power button to discharge residual power. I ground myself using an anti-static wrist strap or by touching a metal surface on the case. I work on a clean, flat surface with enough light and remove jewelry to avoid shorting components.
How do I install a memory module into the slot?
I open the slot clips, align the module’s notch with the slot key, and press evenly on both ends until the clips snap into place. I avoid touching the gold contacts and handle the module by its edges. If a clip resists, I stop and realign the module rather than forcing it.
My system won’t boot after installing new memory. What should I do?
I reseat the modules to ensure they’re fully seated and the clips are locked. I try booting with one module at a time to identify a faulty stick or slot. I clear the CMOS per the motherboard manual if needed, and verify the modules meet the board’s specs. If problems persist, I test the modules in another compatible system or contact the reseller.
How can I check that Windows recognizes the new memory?
I open Task Manager and go to the Performance tab to see total installed memory and channel configuration. I also use System Information (msinfo32) to confirm capacity. For more detailed timings and SPD data, I use a tool like CPU-Z.
Should I update my BIOS after installing new modules?
I only update the BIOS if the motherboard manufacturer lists improved memory compatibility or if the new modules don’t work with the current firmware. I follow the manufacturer’s upgrade instructions precisely and back up important data first, since a failed BIOS update can render the system unbootable.
What’s the difference between memory speed and capacity for gaming?
I prioritize capacity for modern gaming — 16GB is a common sweet spot. Faster memory speeds can improve performance in some games and CPU-limited scenarios, but gains vary by platform. I balance capacity and speed based on the CPU and motherboard specifications to get the best overall result.
Where should I buy memory modules to avoid issues?
I purchase from authorized resellers or directly from reputable brands like Corsair, Kingston, Crucial, or G.Skill. I check for warranty info, return policies, and model compatibility. Avoid unknown sellers that offer suspiciously low prices, as they may sell counterfeit or unsupported modules.
How many modules should I install to use dual- or quad-channel memory?
I follow the motherboard manual to populate slots in the recommended order, typically pairs for dual-channel and sets of four for quad-channel. Using matched modules in the correct slots ensures the system runs in multi-channel mode for higher memory bandwidth.

Marcus is a Senior Hardware Analyst with over 15 years of experience in system architecture and PC building. Specializing in memory optimization and overclocking, he translates complex RAM specifications into practical, easy-to-understand guides. When he isn’t bench-testing the latest DDR5 kits for AllTopSoft, Marcus is likely tinkering with his custom liquid-cooled home server.