I want to make this simple and practical. Performing a proper RAM compatibility check is essential to keep your computer running well for many years. I walk readers through a few quick steps that save time and frustration.
I always recommend confirming your processor supports the memory speed and capacity you plan to install. The motherboard is the hub of the build, so consulting its manual is the first step.
Over the years, I’ve learned that mismatched parts cause instability. By making sure your processor and motherboard align, you avoid buying components that won’t work together.
Key Takeaways
- Start by reading the motherboard manual to see supported module types.
- Verify your processor supports the memory speed and total capacity.
- Doing a quick compatibility check now prevents long-term issues.
- Mismatched hardware often leads to system instability over the years.
- I recommend planning before buying to save time and money.
Understanding Hardware Requirements for Memory Upgrades
Before buying new modules, I map out the exact hardware limits of my board and CPU. This saves time and prevents mistakes when planning an upgrade. I make a quick inventory of the model numbers and sources of information so nothing is overlooked.
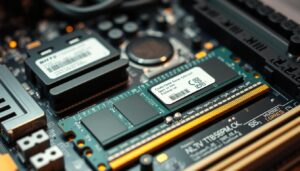
Identifying Motherboard Specifications
I visit the manufacturer’s website to find the supported modules for my specific model. The board manual lists the maximum capacity and supported speeds for compatible memory.
Matching Processor Limitations
Processors can limit achievable speeds because many chips include an integrated memory controller. I confirm the processor limits so I don’t pick parts that waste budget.
- I keep a simple list of my current parts to maintain order during upgrades.
- Newegg’s Computer Memory Finder has helped me find parts over the years.
- Prioritize memory choices based on your computer workload and performance needs.
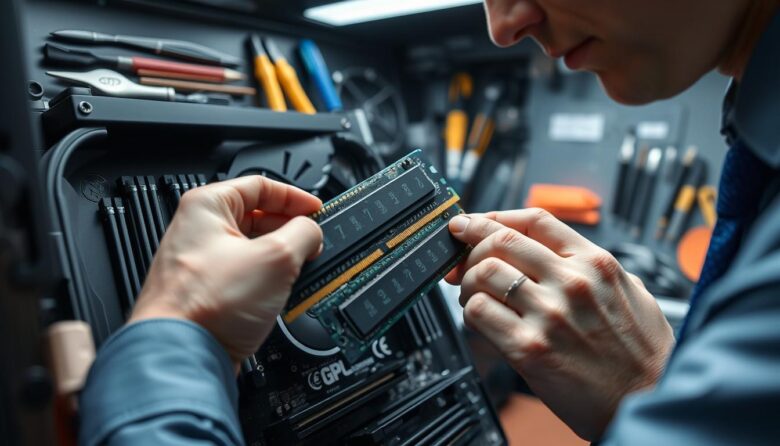
How to Perform a RAM Compatibility Check

Before any upgrade, I record the exact motherboard model and processor details for my computer. This simple step saves time and prevents wrong purchases.
I then make a short list of technical specs: supported memory types, max capacity per slot, speed, and voltage. Keeping specs in order helps me compare parts quickly.
- I verify memory voltage and timing values so modules boot without issues.
- I confirm the slot configuration in the manual to enable proper dual-channel operation.
- I match the processor architecture with the memory specs to avoid firmware conflicts.
When I follow these steps, I choose compatible memory that works well with my existing setup. The process is fast, and my computer runs reliably after installation.
Utilizing System Scanner Software and Manufacturer Tools

I rely on automated utilities to gather accurate system details fast. These tools save time and give me clear information about the memory installed and the exact model numbers present in my computer.
Best Practices for Using Automated Tools
I always download software from the manufacturer’s official website to avoid altered versions. For example, Micron Technology, Inc. provides a utility and lists its address as 8000 S. Federal Way, Boise, Idaho 83707-0006 in the license.
- I read the license before installing; the agreement permits one copy on a personal computer.
- I note that the 1980 United Nations Convention on Contracts for the International Sale of Goods is excluded from the MTI software terms.
- I run scans in the recommended order and follow prompts to keep the results reliable.
| Tool | Use | License | Result |
|---|---|---|---|
| Manufacturer Scanner | Detects module model | One copy per PC | Exact model and settings |
| System Utility | Gather performance data | Official download only | Upgrade suggestions |
Tip: Keep a short list of findings so you can compare parts and plan upgrades over the years.
Final Thoughts on Memory Performance
Keeping memory in top shape takes steady attention over the life of a computer. Small, regular steps add up and prevent surprises down the road.
I recommend visiting the manufacturer’s website now and then for firmware and support updates. These updates can improve system stability and long-term performance.
Plan upgrades, follow the simple steps above, and you will extend your system for many years. I hope this guide leaves you confident to manage upgrades and maintain a reliable machine.
FAQ
How do I find out which memory my motherboard and processor support?
I start by locating the motherboard model from the manual or by running a system information tool. Then I visit the manufacturer’s website and look up the board’s specifications to see supported types, maximum capacity, and supported speeds. I also check the CPU datasheet on Intel or AMD’s site to confirm any limitations the processor places on memory channels and frequency. This gives me a clear list of compatible modules before I place an order.
Can I mix different memory brands and sizes in one system?
I generally avoid mixing brands and sizes because mismatched modules can reduce performance and cause instability. If I must mix, I make sure the modules share the same type (e.g., DDR4), similar speed, and timings, and I install them in the slots recommended by the motherboard manual to keep dual- or quad-channel modes working properly.
What tools do you recommend to perform a memory compatibility scan?
I use the manufacturer’s system scanner on the motherboard or memory vendor sites, and I also run third-party utilities like CPU-Z or Speccy to confirm current module details. These tools help me compare installed memory against supported lists and spot mismatches in size, speed, or voltage before I buy new modules.
How do processor limitations affect memory performance?
I check the processor’s supported memory frequency and the number of channels it can handle. Even if the board supports high-speed modules, the CPU may cap the usable frequency. That’s why I match memory speed with both the motherboard and the processor to avoid overpaying for performance I can’t use.
What are the best practices when using automated compatibility tools?
I verify scanner recommendations against official product pages and cross-check part numbers. I update BIOS or firmware if suggested, and I review the return policy before I order. Automated tools are helpful, but I treat their output as a starting point rather than the final word.
How many years will a memory upgrade typically remain relevant?
I find that a quality upgrade usually stays useful for three to five years for mainstream systems, depending on evolving software demands and whether the motherboard supports future processors. For gaming or professional workloads, I plan upgrades more frequently to keep performance competitive.
If a module fits physically, does that guarantee it will work properly?
No. Physical fit is only part of the equation. I confirm voltage, timings, and SPD profiles match what the board and CPU expect. Even physically compatible modules can cause instability if their specs exceed the platform’s limits.
Where can I find a verified list of compatible memory for my model?
I go to the motherboard manufacturer’s Qualified Vendor List (QVL) page and the memory maker’s compatibility finder on their website. These lists and databases show tested modules by model number and help reduce the risk of ordering parts that won’t perform as expected.
Should I update my BIOS before installing new memory modules?
I often update the BIOS when adding newer memory, because firmware updates can improve memory compatibility and stability. I follow the motherboard maker’s instructions closely and back up current settings before flashing to avoid configuration issues.
How do I balance cost and performance when choosing memory?
I compare real-world benchmarks for the applications I use, review pricing per gigabyte, and prioritize modules that match my motherboard and CPU capabilities. Spending more on top-tier speeds makes sense only if both the board and processor can leverage that higher performance.

Marcus is a Senior Hardware Analyst with over 15 years of experience in system architecture and PC building. Specializing in memory optimization and overclocking, he translates complex RAM specifications into practical, easy-to-understand guides. When he isn’t bench-testing the latest DDR5 kits for AllTopSoft, Marcus is likely tinkering with his custom liquid-cooled home server.