
I wrote this guide to help you get the most from your memory. I will show you how to set the right options in the BIOS so your system actually runs at the RAM speeds it was built for.
Most PCs ship with conservative defaults. That means your modules may sit below their rated speed. I explain the difference between Intel Extreme Memory and AMD EXtended Profiles for Overclocking so you know which one to pick.
In clear steps, I walk through how to enable xmp and how to use EXPO settings without stress. You’ll learn a simple key change in the BIOS and how that affects real-world performance.
Key Takeaways
- I will show how to enable XMP profile settings in your BIOS safely.
- Default system settings often limit RAM speed; this fixes that.
- Knowing the difference between XMP and EXPO is the key to choosing correctly.
- Changes are small but can boost performance in games and apps.
- I keep the steps simple so you can follow them with confidence.
Understanding Memory Profiles and Performance
Memory profiles store tuned DRAM timings so you can boost speed without guesswork.
I get the common question about what these presets actually do. They read timing data from the SPD chip and load tested DRAM values into your BIOS.
There are a few names to know: Intel’s Extreme Memory, AMD’s EXtended Profiles for Overclocking, and DOCP on some motherboards. Each option applies ready-made settings so your RAM runs at rated speed.
Motherboard compatibility matters
Always check the QVL list on the manufacturer’s site to confirm your DRAM support. That list shows modules the motherboard vendor validated for stability and speed.
- Safe overclocking: Using a tested memory profile is the safest way to overclock RAM.
- Manufacturer info: Visit the official site for the most accurate compatibility information.
- BIOS options: Modern motherboards offer varied settings to tune performance.
| Profile Type | Common Name | What it sets |
|---|---|---|
| Intel preset | Extreme Memory | Timings, voltage, rated speed |
| AMD preset | EXPO | Optimized timings for AMD platforms |
| Motherboard variant | DOCP | Compatibility layer for some RAM on non-Intel boards |
Why You Should Enable XMP Profile
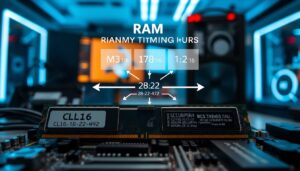
A small BIOS change can free the full potential of high-speed RAM kits like 6000 MHz or 6400 MHz.
I often see users run fast modules at slow defaults. That wastes money and lowers real-world performance for gaming and heavy tasks.
Enabling xmp boosts frame rates and reduces load times in demanding software. It is a software-level setting that applies tested timings and voltage so the hardware reaches rated MHz without manual tinkering.

- Faster gaming: Higher speed RAM improves minimum and average FPS in many titles.
- Better multitasking: Your system handles memory-heavy tasks with less stutter.
- Simple setup: Most modern motherboards support this overclocking option, so it takes minutes to apply.
“Using the extreme memory profile is one of the fastest ways to unlock the advertised speed of your kit.”
| Setting | Typical Result | When to use |
|---|---|---|
| Default SPD | Conservative speed, lower performance | Stable out-of-box use |
| xmp / extreme memory | Rated MHz (e.g., 6000/6400), tighter timings | Gaming, content creation, heavy multitask |
| Manual tuning | Custom speed and voltage, requires testing | Advanced overclocking and fine-tuning |
Preparing Your System for BIOS Adjustments
Before you change anything, take a moment to prepare the system so BIOS changes go smoothly.
Accessing the BIOS Interface
I restart the PC and watch the startup screen to enter bios. On most boards the Delete key opens the firmware menu during POST.
Once inside, press the F7 key to switch to advanced mode where memory settings live. Advanced mode exposes dram, voltage, and overclocking options.
I always check the motherboard manual for the exact key or menu layout. Manufacturers vary, and that information prevents guesswork.
Find the DRAM configuration or overclocking section to enable xmp expo support for your specific ram. Adjust speed and voltages only after you note the current values.
“Proper preparation keeps hardware stable and reduces the chance of boot issues after a setting change.”
| Mode | Typical Location | Why it matters |
|---|---|---|
| Advanced Mode | Top menu / F7 | Shows full memory settings and dram timing options |
| Overclocking Section | OC / Tweaker menu | Where you apply xmp expo and voltage changes |
| Save & Exit | Exit menu | Commit changes or revert if unstable |
- Restart, press Delete to enter bios.
- Switch to advanced mode (F7) and open DRAM or OC menus.
- Record current values, then make careful changes and save.
How to Enable XMP Profile and EXPO Settings
Before changing anything, I walk you to the right BIOS page so the process is quick and safe.
Configuring Intel Platforms
I enter the firmware and switch to advanced mode, then open the Ai Tweaker or OC menu.
On that page I select XMP I or XMP II to apply the memory timing and dram voltage the kit expects.
Tip: You can see the new speed on the main screen before you boot.
Adjusting AMD Settings
For AMD, I look for EXPO or the DOCP alternative on the same overclocking page.
Choosing the expo option sets rated MHz and tighter timings for AMD motherboards.
Managing Advanced Tweaked Profiles
When I use a custom or aggressive profile, I watch for stability issues after reboot.
I press the F10 key to save and exit so the system restarts with the new settings applied.
If the board fails to boot, I revert to the previous mode and test different voltages or lower speed.

“Use tested presets first — they give the best mix of speed and reliability for daily use.”
| Platform | Common Menu | What it sets |
|---|---|---|
| Intel | Ai Tweaker / OC | XMP I/II: speed, timings, voltage |
| AMD | OC / Memory | EXPO: optimized timings for AMD |
| Advanced | Custom Profiles | Higher speed; requires testing |
- Enter BIOS and open advanced mode.
- Select the appropriate profile on Ai Tweaker or OC page.
- Press F10 to save and reboot, then verify memory settings on the main screen.
Verifying Your New Memory Speeds
Once the BIOS writes the change, I confirm the system shows the new speed in Windows.
I open Task Manager and click the Performance tab, then select Memory. The manager displays the current speed and total RAM.
If the number matches the kit’s MHz, the setting worked. If it does not, I return to the BIOS menu, recheck the memory settings, and save again.
I also use CPU-Z or similar software to read dram frequency — divide that value by two to get effective MHz on DDR kits. This gives extra confirmation the xmp change is active.
“Verifying in both Task Manager and a dedicated tool removes doubt and helps spot stability issues early.”
- Open Task Manager → Performance → Memory and note the speed.
- Run CPU-Z to check dram frequency and timings.
- If you see instability or wrong speed, update the motherboard BIOS for better compatibility and retest.
| Verification Step | What to Check | When to Act |
|---|---|---|
| Task Manager | Displayed speed matches RAM package | First quick check in Windows |
| CPU-Z / Software | DRAM frequency and timings | Confirm xmp profile and MHz |
| Stability Test | System runs without crashes or errors | If issues occur, re-enter BIOS and adjust settings |
Conclusion
Thanks for following this guide. I hope it helped you enable xmp or expo and unlock better RAM performance for gaming and daily tasks.
, double-check motherboard compatibility and dram voltages before you change any options. Your motherboard and hardware determine the safest path to higher MHz and stable system operation.
Verify the speed in Windows and with a tool like CPU‑Z. If you have a question about bios settings, visit the official support site for your board and keep software and firmware up to date to avoid issues.
I recommend testing stability after any overclocking change so the system runs smoothly and reliably.
FAQ
What are memory performance profiles like XMP and EXPO?
I explain that these are motherboard-supported settings stored in RAM modules that let your system run memory at higher rated speeds, tighter timings, and optimized voltages. They save you from manual timing changes and help games and heavy apps perform better. I recommend checking your RAM kit specifications from brands like Corsair, G.Skill, or Kingston before changing anything.
How do I know if my motherboard supports these memory modes?
I check the motherboard manual or the manufacturer’s website—ASUS, MSI, Gigabyte, and ASRock list supported memory standards and tested RAM. I also look at the BIOS/UEFI pages for memory options and the QVL (qualified vendor list) to confirm compatibility with specific DIMMs and speeds.
Why should I enable a memory performance setting?
I use that option to unlock the RAM’s advertised speed and timings without manual overclocking. It usually boosts game frame rates, reduces load times, and improves multitasking responsiveness. For most users, it’s a low-risk way to get better performance if the hardware is compatible.
What should I do before I change BIOS memory settings?
I make a full backup of important files, update the BIOS to the latest stable release from the motherboard maker, and note current settings. I also test system stability with the stock configuration in Windows using Task Manager and a basic stress tool so I can compare results later.
How do I access the BIOS/UEFI to modify memory settings?
I reboot the PC and press the manufacturer’s key—Delete, F2, or F10—during startup to enter advanced mode. From there I navigate to the overclocking or DRAM menu where memory options are shown. Many boards also provide a simple EZ mode with quick toggles for memory speed.
How do I apply memory speed settings on Intel systems?
I enter the BIOS, open the AI Tweaker or OC section on ASUS, the M.I.T. on Gigabyte, or similar areas on other boards, then select the memory option and choose the recommended higher setting for the kit. I save and reboot, then verify stability in Windows with a tool like MemTest86 or a stress utility.
How do I set the equivalent on AMD platforms?
I open the BIOS and go to the overclocking or A-XMP/DRAM settings section. AMD boards may label options differently—look for single-click memory profiles or manual timing entries. I pick the profile that matches the RAM’s rated specs and then test stability with Prime95 or dedicated memory testers.
What if I want to fine-tune timings or create advanced profiles?
I recommend starting with the automatic kit profile, then adjust one timing or voltage at a time. I stress-test after each change. For serious tuning, I use vendor software or BIOS manual timing fields and keep a log of each setting and test result to avoid instability.
How can I verify the new memory speed in Windows?
I open Task Manager > Performance > Memory to see the current effective speed, or I run CPU-Z to read DRAM and memory frequency values (double the DRAM frequency for DDR). I also run a memory benchmark or stability test to confirm the system runs smoothly at the new settings.
What troubleshooting steps do I take if the system becomes unstable?
I revert to the previous BIOS setting or safe defaults, increase DRAM voltage slightly within manufacturer limits, and test one change at a time. I also try different DIMM slots, update the BIOS, and consult the motherboard QVL. If problems persist, I contact the RAM or board maker’s support.
Will using these memory settings void my warranty?
I check the warranty terms from the RAM and motherboard manufacturers. Many vendors allow using manufacturer-provided memory settings, but manual voltage increases beyond rated specs can affect coverage. When in doubt, I contact support for clarification.
Are there software alternatives to change memory operation from Windows?
I usually prefer BIOS adjustments, but some vendors offer Windows utilities from ASUS, MSI, or Gigabyte that can toggle memory modes. These tools can be convenient, but I still recommend making final changes in BIOS for reliability and to avoid conflicts during startup.

Marcus is a Senior Hardware Analyst with over 15 years of experience in system architecture and PC building. Specializing in memory optimization and overclocking, he translates complex RAM specifications into practical, easy-to-understand guides. When he isn’t bench-testing the latest DDR5 kits for AllTopSoft, Marcus is likely tinkering with his custom liquid-cooled home server.